We use cookies to improve your experience on our website and for marketing. Private Policy.

How to Create a Magento Report in Power BI Desktop

Sales Cube Magento Extension for Power BI Desktop
Being good in business means having your laptop fully equipped with all BI tools and solutions. If you are a business owner, or plan to have such, you cannot go without using the Magento extension for Power BI Desktop version for your business analysis version for your business analysis.
To trim more cash doing your business in highly competitive niches online, means to invent something new; something to attract more and more satisfied clients daily.
NB: Without Sales Cube extension you won’t be able to connect Magento with Power BI Desktop!!!
Step 1: Opening Power BI Desktop
If you still do not have the Power BI Desktop installed, you may need to download Power BI Desktop . Before an actual downloading process, select your spoken language and proceed further. Power BI tool is absolutely free of charge and is open to everyone worldwide. After installing, open Power BI Desktop software on your PC or laptop.
To connect to the Magento database and complete the dataset integration process, a user needs Sales Cube extension from Insights Ready developers. It is required for future report creation. Adobe Commerce is also supported
Without the Insights Ready Sales Cube extension, the business intelligence data from Magento 1 or 2 e-commerce (Adobe Commerce) system won't upload to the Microsoft Power BI reporting solution.
In the Power BI application, click on the button Get Data and, in the drop-down list, select Power BI datasets.
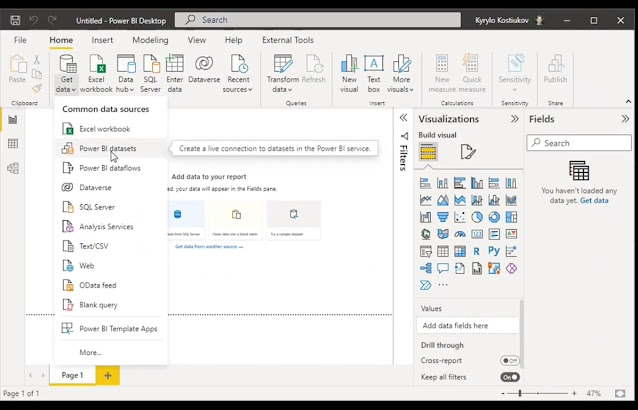
Then, you will be redirected to the Data hub to pick the required dataset for future research purposes and Power BI report creation.
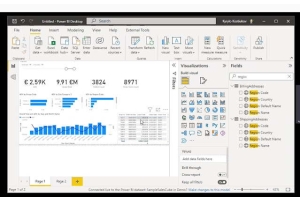
For this reporting we will work with the SampleSalesCube set of data in order to create the Sales Average Order Value report report. The image below shows how it looks like in the Power BI Desktop reporting tool.
When the dataset is selected, we click on the yellow “Connect” button at the bottom right corner to proceed to further analysis.
Why is it recommended to use Power BI Desktop instead of Power BI Service version from the very beginning?
The explanation is as follows.
The Desktop PBI version has certain valuable features which the merchant will not find (and won’t be able to add manually) in the Service version.
Distinguishing features in the Power BI Desktop are:
For the contrast, reports created in the Power BI Service, if deleted by mistake or on purpose, cannot be restored. Due to this, the PBI Desktop version as an analysis and reporting tool is considered more safe and secure compared to PBI Service.
Step 2: Pre-filter Your Data
This step is required to set aside the data which is considered irrelevant for the reporting; making your analysis more precise, and thus, valuable.
Here, we will show how to leave unnecessary aside for the Sales Average Order Value sample report . Now, let’s prepare our data. Adding the OrderDate field.
Firstly, you need to type in the “Filter” section the phrase “order date”. Then, drag it to the report.
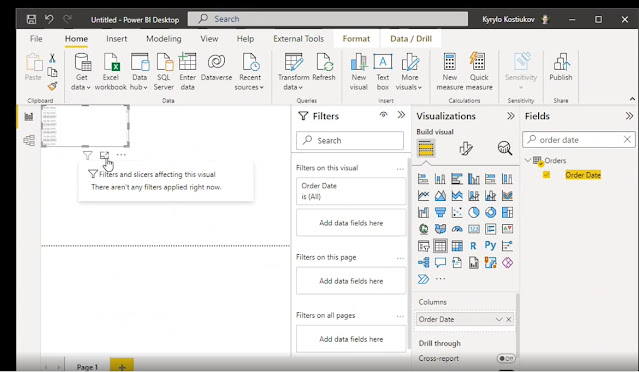
By using a Slicer the order data values transform into a dimensional scale. With the help of this scale, we are now able to set manually the time period of the data to be taken and analyzed.
Step 3: Adding Measures
The Power BI Desktop version has an option of adding formulas and measures. This feature is available in the desktop version only.
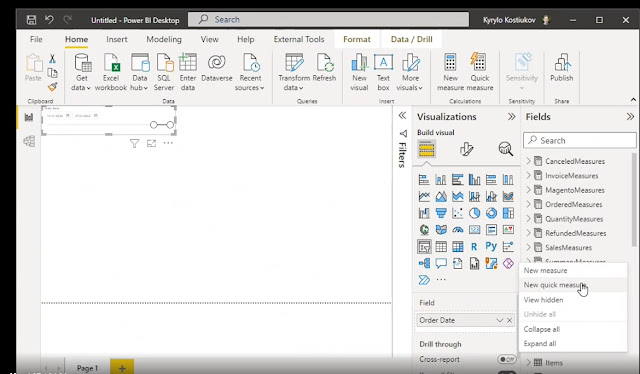
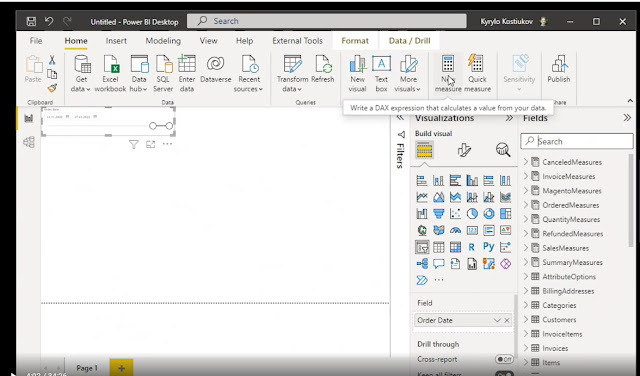
Measures can be added in two ways. The first one is by clicking on the New Measure drop-down menu on the top right. The second solution is to click on three dots close to the table names (e.g. Summary Measures) in the Fields section.
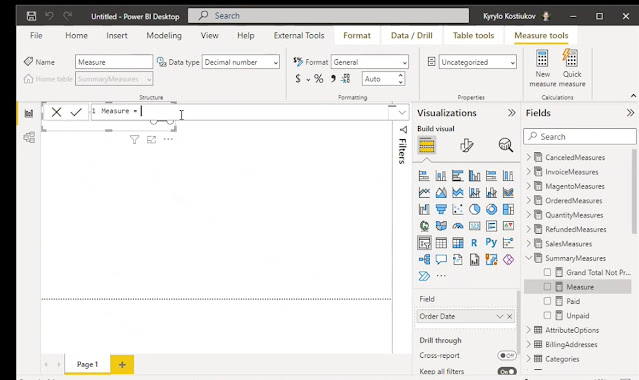
If you use the second variant, a new measure will be added directly to selected table:
To calculate an Average Order Value add an AOV formula as the screenshot below shows:
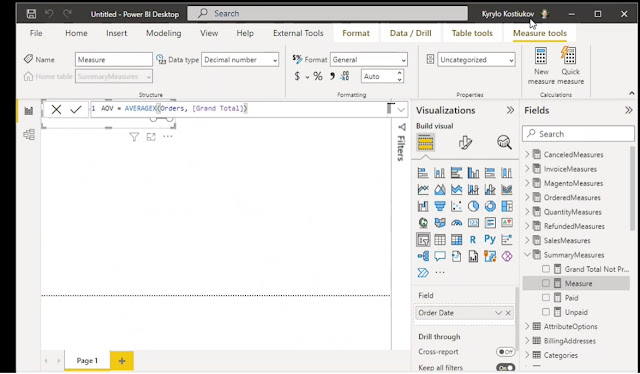
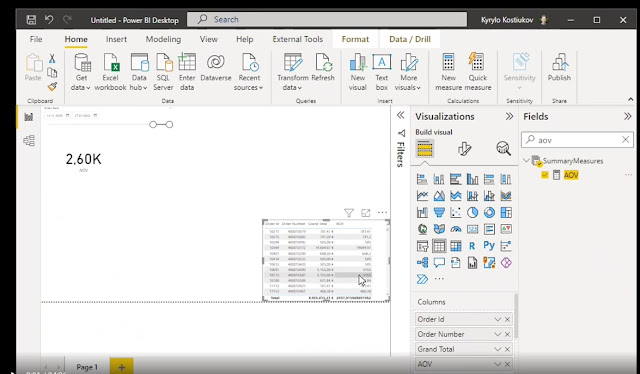
When the formula is applied correctly, we transform our AOV into the KPI.
This is the formula we will use to calculate AOV:
Average Order Value = AVERAGEX(VALUES(Orders[Order Id]), [Grand Total])
To sum up, there are three main things you should do, namely:
Always test your formula before proceeding further. We advise you to do the formula correctness test in such a way. Test your formula using a small dataset in order to quickly check if it works right.
Step 4: Adding more Complex Formula
For our AOV report , we will calculate the averages for two groups of orders. The first group is an average value of all new orders placed by the first time customers. The second group is the same AOV formula but for returning clients.
For the start, we need to separate 1st customer orders from the other orders we have. We will do it by creating a couple of new formulas.

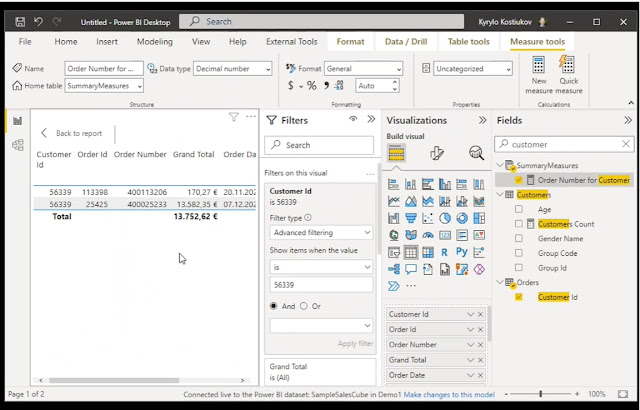
In our table where we are testing the KPIs, we will order the data by Customer ID and will look for clients who have two or more orders.
By using the formula 1st average order value, we have all orders with order number 1, meaning this is the first order placed by the customer.
For the second stage of our analysis, we use a similar formula. Pie charts best suit our visualization. We choose to apply a pie chart diagram, and our AOV report is ready.
Here are the exact formulas we have used:
Order Number for Customer = CALCULATE(COUNT(Orders[Customer Id]), FILTER(ALL(Orders), AND(Orders[Customer Id] = SELECTEDVALUE(Orders[Customer Id]), Orders[Order Id] <= MAX(Orders[Order Id])))) 1-st order AOV = SUMX(FILTER(Orders, [Order Number for Customer] = 1), [Average Order Value]) Repeated order AOV = SUMX(FILTER(Orders, [Order Number for Customer] > 1), [Average Order Value])
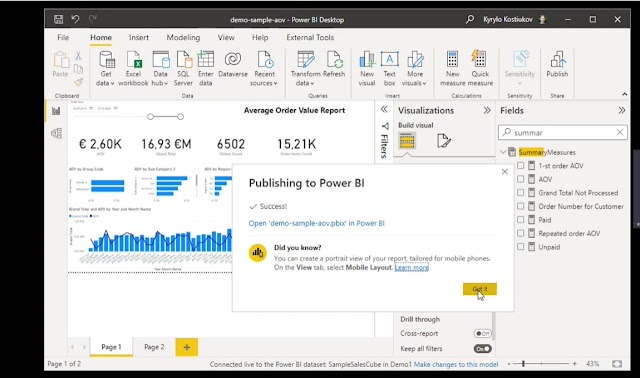
Step 5: Saving & Sharing Power BI Desktop Report
In the Power BI Desktop version, the user may not only save the report, but also share it like it is shown on the image below.
Conclusions
The aim of this Magento Dataset in Power BI Desktop article is to teach the user how to create the first Magento 2 business intelligence report analysis with the Power BI Reporting Suite.
What you get in return after your purchase is the integration of your Magento shop data with Power BI analytical and reporting tools. The core features are:
We suggest, the article was valuable for our readers. Now you possess a knowledge and a skill and is able to to create your first Power BI Desktop report on your own.
Magento is now Adobe Commerce
Adobe BI extension Adobe Commerce is a platform for creating multi-functioning management & marketing experience for B2B and B2C. With Adobe Commerce Power BI integration, every Adobe Commerce merchant can load his or her online webstore data to Power BI, thus having it vizualized. Adobe Commerce BI Extension when integrated to Power BI will help to have a clear view on your future business development.
0 Comment(s)
Recent Posts


Featured Posts